AMain stem
1 piece × 650 mm
Saw setting: 0° / 0°
 Instagram
Free building guide
One cutting list. Four simple steps. A snowflake made by you.
29 pieces · 30 × 50 mm wood
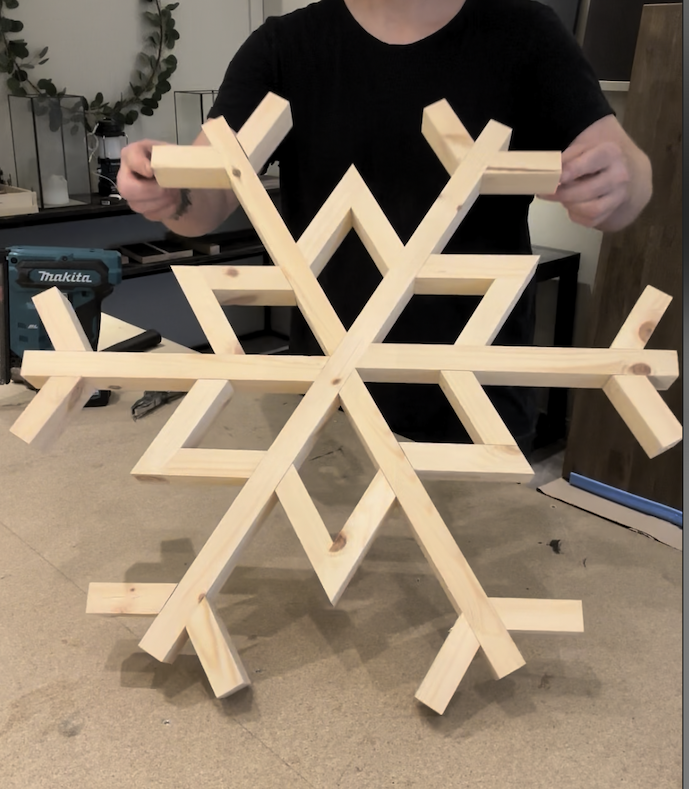
Use wood that measures 30 mm across the front face and 50 mm deep. Use the same section for every piece. Check the actual face width before starting.
You need a saw, pencil, tape measure, clamps, sandpaper, glue and screws or nails.
Clamp the wood securely. Keep hands clear of the blade and cut small parts from longer stock where possible. Follow your saw manufacturer’s instructions.
0° on the mitre saw makes a square cut (90° to the long edge). 30° on the saw makes an angled cut (60° to the long edge). Keep the blade upright: no bevel tilt.
Measure A straight from end to end. For B and E, measure the longest edge. C and D have two equally long edges. Do not measure diagonally between opposite tips.
1 piece × 650 mm
Saw setting: 0° / 0°
4 pieces × 316 mm
Saw setting: 30° / 0°
6 pieces × 120 mm
Saw setting: 30° / 30°
6 pieces × 85 mm
Saw setting: 30° / 30°
12 pieces × 80 mm
Saw setting: 30° / 0°
C and D: Cut both ends parallel, sloping the same way. The sketch shows the front face. Saw settings are shown at each end.
Dimensions are in millimetres, rounded to the nearest whole millimetre. Cut and dry-fit one sample of each part before cutting the rest.
The original list used 315 and 115 mm. With a 30 mm face width and this butt joint, geometry gives 316.34 mm for B and 119.64 mm for C. These are rounded here to 316 and 120 mm. A, D and E are unchanged. The length difference between C and D is 2 × face width / √3, not just the width.
This list is for a 30 mm front-face width. Different widths change B, C and the outer-branch setback. For width w in mm: B = 325 − w / (2√3), C = 85 + 2w / √3. Do not use the 30 mm list unchanged for other widths. Depth does not affect the front-view geometry.
Step 1 / 4
Lay A flat and mark its centre: 325 mm from each end. Place two B pieces on each side, angled cuts against A and square ends pointing outward. Follow the drawing, with 60° between neighbouring arms. Dry-fit before gluing and fastening.
Step 2 / 4
Use one C and one D for each V. Butt the end of D against the long side of C – do not join the two tips together. Align the edge of D with the angled end of C. All pieces lie in the same plane. Make six matching pairs.
Step 3 / 4
Place one V in each gap. Both free angled ends sit against the sides of the main arms. Position and adjust all six before fastening. With rounded cutting dimensions, trim the sample if a joint has a gap.
Step 4 / 4
Place two E pieces at each of the six ends, mirrored left and right. Angled ends meet the side of the main arm; square ends face outward. Set the outermost point of the contact edge 30 mm back from the arm end, as shown in the detail. Dry-fit all twelve before fastening. Sand the edges and remove glue residue.
Drawings are calculated from the model. They are not full-size cutting templates. Make a sample first; the revised version has not been physically test-built.
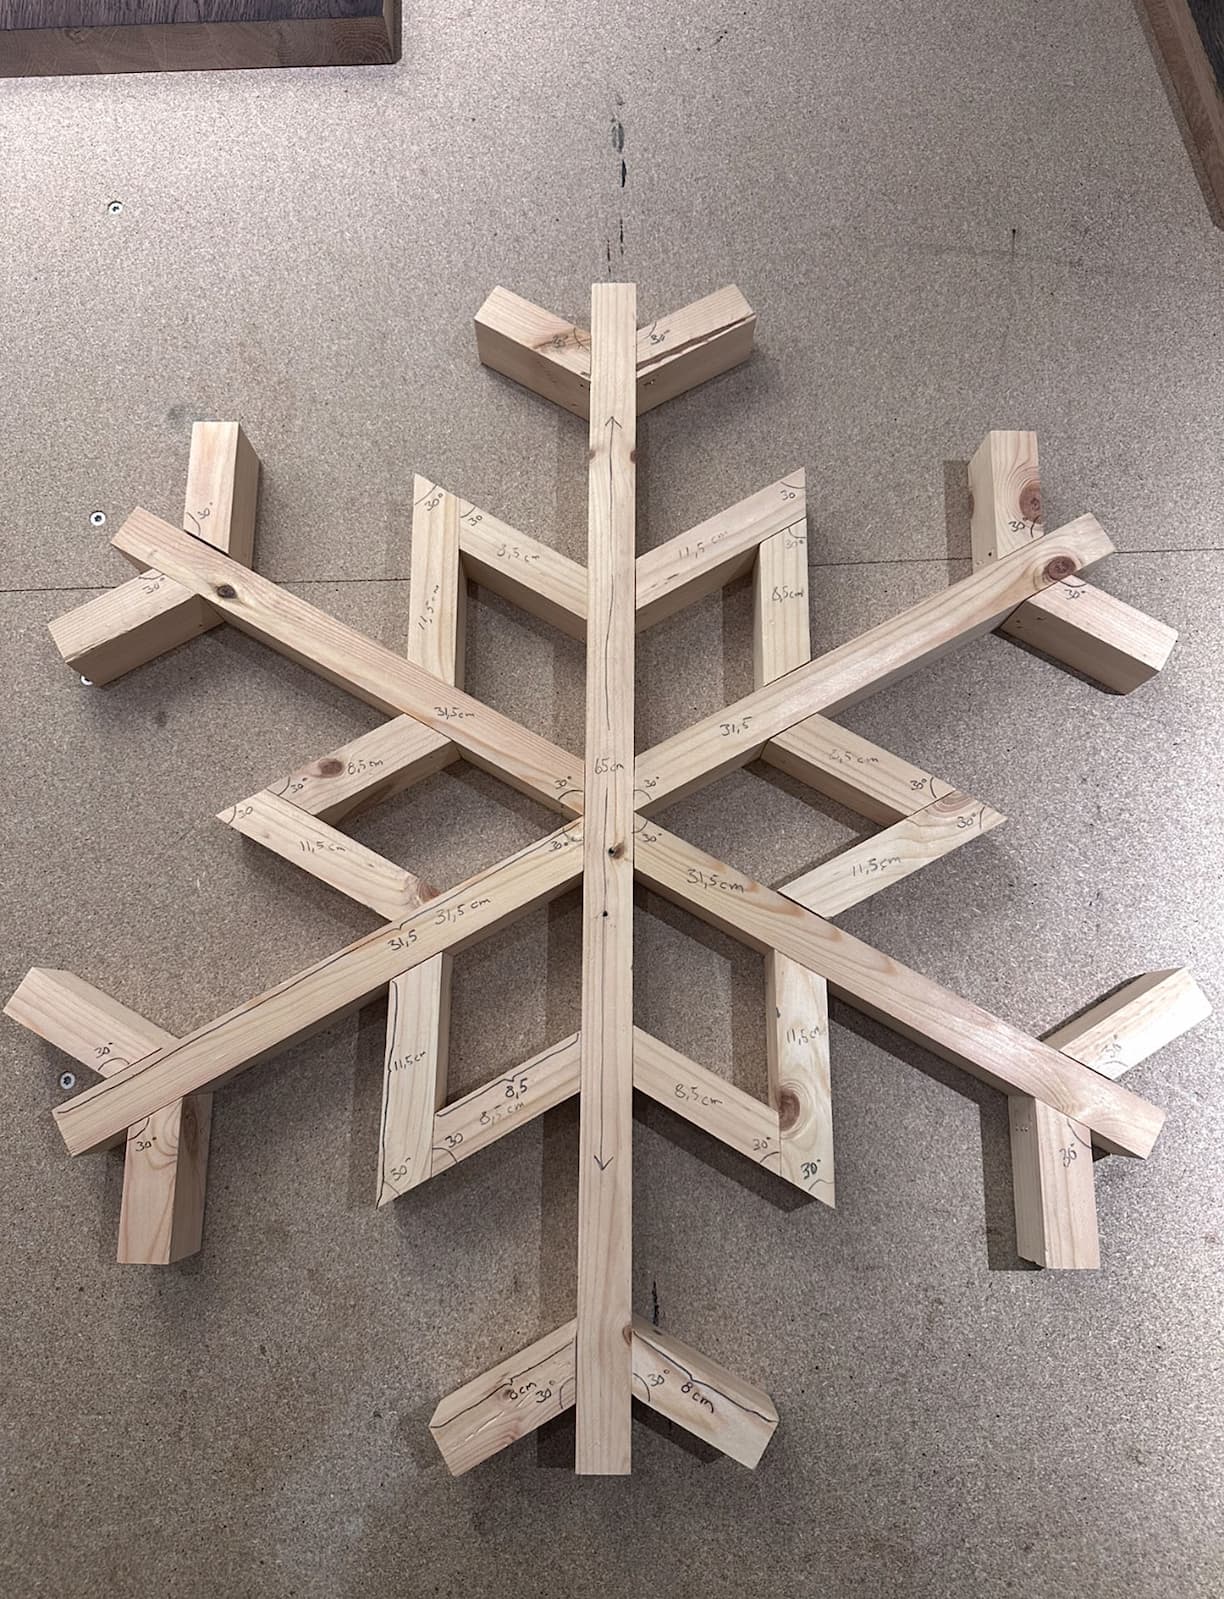
The photograph shows Espen’s original. Its handwritten measurements belong to that original; use the cutting list on this page for the calculated version in wood measuring exactly 30 × 50 mm.
I’d love to see your finished snowflake. Tag @tresloeyd when you share it on Instagram.
@tresloeyd ↗Makita og Gorilla Glue – verktøy og lim jeg bruker i verkstedet.